Tag Archives: ComicCon

Weeping Angel – Mask, Wig and Sleeves

Hopefully this one will be a little shorter!

The mask. I wanted to sculpt it myself like Penwiper and Kilayi but ultimately I ran out of time. I ordered one on amazon that looked like this.

mask1

It’s a vacuform one, so thin moulded plastic, with an elastic strap. The eyes are covered with a quite open weave mesh material, sort of like tights. I took it out, because it lay flat across the holes and there wasn’t any room for my eyelashes and it was irritating. The mask was also a little too big for my face – too wide, and too high at the top. Thankfully this kind of plastic needs only a small amount of heat to re-mould, so all I did was hold it over the gas hob for a very short time and then squeeze it thinner, and wait for it to cool. If you’re leaving the eye coverings in, be really careful, because they will melt too. At this point it’s a good idea to add breathing holes too. I used a hot pin to open up the nostrils a little, and poked half a dozen tiny pin holes around the mouth. I still had to whip it off now and then to get a few breaths in, but I think it was better than it would have been.

For the height, I trimmed it down to the ribbon part, which was enough as it then sat nicely against the wig. It’s painted in the same way as the wings and dress – dark grey, mid grey highlights, then light grey highlights. Again, I’d prepare everything and paint all at the same time to be sure of matching colours.

IMG_4147

Under my mask for the eyes I used Snazaroo Dark Grey face paint. This way, for pictures all I needed to do was close my eyes to give the full stone effect, but I kept perfect visibility for moving around. It was a little tricky as when your eyes are closed you don’t know when the picture is done. I was listening out for shutter noises, or waiting for flash, but I probably held my pose a little longer than necessary but whatever.

The Wig.

I started off with this (fairly awful) wig from ebay.

wig

When it came it looked quite thin and I was worried it’d be no good, but it worked out ok. First I pinned it to a polystyrene head covered in cling film. Then I sectioned off the front part, and tied the rest in a low ponytail. I tried to make a small bun out of it but it was tiny, so I wrapped half an old sock around the pony tail to bulk it out, then wrapped the pony tail around. Securing it was a nightmare, so at this point I added a bunch of glue and the headband. It was just a strip of fabric with the ends turned under, and I wrapped it over the top and the ends wrapped around the bun, with the front bits still hanging loose. Then I added more glue. I pretty much just spread superglue all over. The front pieces now come in – I took one side, draped it round the back, over the bun, around and under. Loads of glue. Then the same with the other side. Glue everything, and stick down any stray hairs.

IMG_4041IMG_4042

Then it’s more painting again.

  IMG_4150

The sleeves. Another Penwiper/Kilayi idea – you take a pair of tights, and cut a hole in the crotch. This is the neck hole, and the legs become sleeves. With your hands in the ends, you pin between the fingers so you know where to cut. Then use whipstitch to make the fingers or the gloves. It will take a long time and be careful to only get the edges, or it’ll be too tight on your fingers. Put them back on, and if they fit nicely, use nail varnish to seal the seams. make a tuck at the wrists so they’re nice and tight, then turn them inside out and put them on. Add false nails to the end. Be sure to liberally put lotion or oil on your own nails so you don’t end up with everything fused to yourself. Then while wearing them, paint them and let them dry. This way they stay big enough to wear. If you want to have more stretch, you can use fabric paint, but I wasn’t going to spend the money on it.

IMG_4148

Creepy right?

Kilayi and Penwiper also made a hood out of tights to cover the neck, and I made one, but it was so hot, I knew I’d never cope with it for long. So before putting anything on I used more of the Snazarro Dark Grey to cover my neck, around the edge of my face, and up halfway on my ears. The wig or mask covers the rest. After a tip online I sprayed all the face paint with hairspray to help it keep, and most of it did until walking back to the car in a light rain. Not bad for water based.

And that’s it really! I recommend wearing a vest top underneath to prevent any rubbing, then the tight/sleeves, then the harness, then the dress. Here you’ll need help – someone to put your wings in and zip you up. They go through the holes in the dress and into the harness. Then do the dress up. The mask goes on next, then the wig so the strap is hidden, but I actually had the wig fit under the top of the mask, so you still get the fringe bits on the mask visible as I couldn’t for the life of me think how to make the wig behave that way.

Done! Thanks for reading, it was loads of fun to do, and wearing it was amazing.

1 Comment

Filed under Uncategorized

Weeping Angel – The Wings and Harness

If you’re interested, dress instructions are here.

On to the wings. The wings are tricky. The front and back are different, and you need a way for them to attach, while looking like everything is one piece of stone. I combined ideas from Kilayi’s post and Penwiper’s TheRPF thread.

What you need for the wings:
About 2m of pvc pipe. I used 22mm wide.
45° pipe joints (4)
90° pipe joints (2)
T pipe joints (2)
large foamcore board (2) – this is a light foam with paper glued either side to keep it rigid.
A LOT of 6mm EVA foam – I used 2 cheap yoga mats and a handful of A4 sheets when I ran out!
SO MUCH GLUE. Glue guns are your friend, or failing that a fast acting superglue.
You’ll really want a craft knife too for the foamcore, help yourself out and buy a cheap one. I managed with scissors but it was a bit nightmarish.

This picture I printed from Kilayi – the plan was to use her PVC boning system, combined with Penwiper’s foamcore centre layer to make them solid.

 IMG_3982

As you can see, I kind of divided up lengths and stuff and figured out a ratio to use to blow it up to the right size. I’m 5 ft 6, and decided on just over 3 feet long. I looked for photos of a full wing from the actual show to use, but I couldn’t find one that clearly showed a whole wing, so I am hugely indebted to Kilayi for this one! All in all I spent about 2-3 hours one evening calculating the dimensions and transferring a version of it to some scrap wallpaper for a template for the foam core.

IMG_3981

Remember, this is going to be hidden by the foam, so you don’t need the individual feather shaping at the bottom, but it helps to remember where things will be. You’ll also want the feathers to overlap and meet at the edges, so allow for that when cutting them out later.

Next you want to arrange the pipe into this kind of construction. The horizontal sections are very slightly bent to help get up into that raised part at the top. It takes very little heat to do this, I held mine over my gas kitchen hob for a few seconds and then quickly stuck it in the joint and bent it. It will need glue in that joint, and the melt changes the shape enough that it’s not tight. I glued all my joints, just to be safe!

IMG_4019

In that picture you can see that the pipes are sunk into the foam core. I traced around them onto the wing and cut out the section. This way, after you add the foam you’re not left with a flat side and a side with a big bulge (cheeky!) and you get a bit of thickness to the top of your wing on both sides. after fitting them in, I punched tiny holes in the foam core with my small scissors either side of the pipe and secured it that way.

Next, plan out your feathers. You’ll need a few pictures of the front and back of the wings – google images is good, or you can use the finished wing images lower in this post. Be sure to look at how and where they overlap, and leave enough extra on them to do it. Start cutting out the feathers, and before long, your ‘workspace’ (ie, my front room) will look like this…

IMG_4021

Don’t start to glue anything down until it’s all cut out and planned, or you’ll get gaps or mistakes. I didn’t get pictures of individual feathers, but you’ll see below that they have score marks down the centre and uneven notches to look a bit more like feathers. Begin gluing…now.  Glue to the foam, or the bone pipes, but NOT the vertical pipe that will attach to your harness. It needs to be totally clear so it can be hidden within the dress and attach easily to the harness. After a long time and several mild burns (if using hot glue), or sticking of yourself to who knows what (superglue), or both, you’ll arrive at this point.

IMG_4034

This is where I’ll point out – get foam as close to grey as possible. I couldn’t find sheets of grey cheap enough to justify it, but definitely look, because it is SUCH a pain in the butt getting paint right in all the nooks and crannies. on the fronts with the grey parts I didn’t have to be quite so careful to get every speck.

And the paint job, the same as the dress – dark grey all over – two coats here to fully cover the foam – then a mid grey of highlights, then a light grey of smaller highlights. you can also do a wash of thinned down black in the creases where you apply and wipe off quickly so just the crevices are nice and grimy. I think it’s a great way to age stuff, but I left it off of this project as I think it might have been too much. Leave it to dry and you’re done!

IMG_4082

The only addition I made after this was adding a small amount of fabric to the wing base to hide where it will be joining the dress, hiding any gaps. I just made a loop of fabric and glued it on to the feathers (not the pipe) and let it hang over the pipe. Paint it with the rest, or if you add it after like me, just match the best you can. The highlights help disguise it anyway if it’s not spot on.

On to the harness.

You’ll need:
a cheap/old backpack, or strapping with its assorted clippy bits.
A small amount of scrap fabric
a small piece of wood or similar material
Off cut of EVA foam to line the back
4 pipe clips – matching size to your pipe
Sewing paraphernalia

Start with the wood. You want a small rectangle (mine is rounded at the top like a grave stone shape, because that was the shape backpack I had) that will comfortably fit your back. Attach the pipe clips with the screws. I also drilled small holes either side of the clips and cable tied them on too, because I used two layers of thin plyboard because that’s what I had, and on removing the pipes from the clip, the screws were less than secure.  Glue foam to the back of the wood for comfort.

Use the scrap fabric to sew a well-fitting envelope for the wood, with holes with strengthening stitching for the pipeclips. This needs sewing to the back pack if using or straps attaching to it. I had a small backpack spare as it had a hole in the front, so I cut off all of the front and sides, and sewed the envelope directly to the back. Originally I was going to detach the straps and sew them back on to the envelope, but I thought why mess with something that’s worked fine!

IMG_4146

You have to sew all around the wood, so it doesn’t flop about in the envelope. I sewed it with the wood piece in it for the whole time, but you could leave it out until you have to sew in the top. That would be easier, but you’re more likely to go in too close and be unable to get it in position. I painted the straps as they were bright red and a tiny section was visible. Tiny, but bright red on a grey costume. No good. I also used a ribbon to tie the straps together at the front, holding everything in place a bit more securely.

The harness goes under the dress, and two small slits are made in the back of the dress, just above the top pipe clip. The wing pipe slides in the hole, and just pops straight onto the clips. This way, the wings can rotate so they point back, or out to the side, or in between, but they also stay pretty well where you put them. This also means that if they get a bit knocked by the crowd, they will simply move rather than snap off.  It was also useful for a brief sit down to eat at lunchtime. I wasn’t able to fully sit, but I did manage a short perch on the edge of a chair 🙂

That’s it for wings, not too hard on the face of it, but lots of planning involved.

Next, the wig, mask and gloves, and then we’re done!

Leave a comment

Filed under Uncategorized

Weeping Angel – The Dress

I’ve had a few work in progress requests, so are you ready? here we go!

For the dress I’m afraid I don’t have a huge amount of detailed pictures, as I was sort of fumbling through it. Let me start by saying a huge thank you to Kilayi and Penwiper who came way before me and without whom I wouldn’t have had a clue where to start. Also an enormous thank you to Jen at EPBOT where I think I first found a link to Penwiper’s The RPF thread, and where I found the courage to 1) find and go to a Con and 2) go in costume. I’m fairly introverted and not a huge fan of crowds (and yet Comic Con I hear you ask? I know. It was a big step. More on it later though) but seeing that other people with similar (and more chronic) anxieties could do it, I committed myself to do it.

Right, the juicy bits.

The dress is made up of an inner and an outer dress. The inner dress I originally planned to use an old maxi dress that I wasn’t wearing anymore, until I realised that it was jersey and so would stretch with the weight of the outer layer, ruining any kind of fit work that I had done, so I had to start from scratch. Luckily, a simple shift dress that is ultimately totally unseen, is relatively easy.

for this part you need:

any cheap fabric. I made my under dress out of an old bed sheet and pillowcase, so not that much.
sewing machine and thread.
A long zip. Mine was 20 inches. The longer it is, the easier it is to get in and out of.

I started with the skirt half. Measure your waist, divide by four, and add seam allowance. I added about 2 or 3cm to each piece, that way it would be nice and loose without being baggy. Next, measure the circumference of the hoop for the bottom. Divide that by 4 and add seam allowance again. The hoop holds the skirt out and makes it easier to walk and cooler on the legs. It doesn’t need to be huge, mine was about 125cm. For ease of putting it into the dress, try to get one that opens easily. Luckily, cheap ones tend to!  For length, you want your waist to the floor, plus a few cm to create the tube to hold the hoop. Ideally you want it to juuust skim the floor so it doesn’t drag.

You’ll want those measurements to make 4 pieces like this –

skirt

(Again, huge thanks to Kilayi for this way of explaining. Words aren’t great!)

Match up 2 pairs, pin, and sew down the straight edges. then open them up and line the now two pieces up, and pin and sew down the diagonal edges. Fold up the bottom wide enough to fit your hoop in, and sew, leaving a small gap to insert it. Test that the hoop fits, but take it back out if you can – I couldn’t – as sewing is easier without it in. Once the dress is finished, push it in and through, then join up the ends again. Mine stayed back together fine, but no one’s going to see if you need to glue or tape it.

IMG_3985

Tada! My front piece doesn’t have the strait seam as I managed to make it fit so it was one less seam to do! You might be able to see at the bottom that my seams are all on the outside. I did it on purpose – that way I don’t get irritating seams rubbing.

The top half I’m afraid I didn’t take pictures of, but I basically used an existing dress as a template to make essentially a tank top, and sewed it to the skirt. This next part is my favourite cheat. You might have noticed that with the tank top sewed on method, there’s no opening to attach the zip. I HATE inserting zips properly because it’s a nightmare. So, I pinned the closed zip on the outside of the back of the dress, and sewed it on. You will have to fiddle the zip up and down a little to get the machine foot past it, but it’s much easier than doing it properly, and it’s unseen.

But wait, you say. This zip doesn’t open anything! Open the zip, and then cut down the fabric between it. perfect zip placement, no zip irritating your back! You might find that loose threads catch on the zip, but they pull out easily enough.

Now the outer dress. You’ll need –

A huge amount of light grey fabric. I used more than recommended, I think I bought 5 metres, and used it all.
grey thread, and your machine.A large-ish needle and a contrasting colour thread for gathering. The colour makes it easier to pick out once you’re done.

Essentially, you want a large tube. The length needs to be from just under your arms to the floor plus a few cms to account for the angle, seams, and tuck under at the bottom. You then need an extra bit (I went for 10cm) for the tuck at the waist. Sew together the full width of the fabric to make one very, very wide piece, don’t turn it into a tube yet. Measure yourself around under the armpits, this will give you how wide it needs to be once gathered. using the contrast thread, sew long stitch across the top, with a knot in one end. Hold the thread tight, and push the fabric up evenly until it reaches the measurement you took. You can tie it off and leave it there until you are ready to sew it to the top part, but I did a run of machine stitch over it to hold it all in place.IMG_3973

For the top part you don’t need much. The front is an inverted bridge shape. Again I used and existing top to measure, and went a little larger to make sure, then trimmed it down. The back is two pieces, measured from a top and given a generous overlap for the zip. curved edges are tricky, so snip the edges to help with the bend. The back and front are only attached at the shoulder, this gives a generous armhole to allow movement.

Find the centre of the large skirty bit and line it up to the centre of the top, pin and sew. Keep the overlap in the back, and line it up too, pin and sew.

You can see above on the left where the front is attached but the back isn’t. If you line it up with the centre at the back you should be left with more than enough width in the armholes. I can’t stress enough though, try it on before you permanently sew it (mind the pins), because unpicking is slow, tedious, and irritating! Once it’s attached, you get this:

IMG_3997

Crazy long dress 🙂

Put on the underdress and then the outer dress. That way you can see exactly where to pin it for the fold, and leave enough for the bottom. Pin directly to the underdress.

IMG_4006

Please excuse the mess – sewing with three children has it’s downsides! Once it’s pinned take it off carefully and sew under where the fold will be, so it’s hidden. All that’s left is to sew the back up, and sew the bottom under. The bottom is easy enough, just tuck it under and pin and sew once the back is finished. For the back sew up to the bottom of the zip in a normal seam. for the rest, tuck under and sew close to the zip. Where the gathers are it will meet together easily and cover the join, but at the top you’ll want a fairly large overlap to cover it.

Then it’s time to paint! You want the dress upright really to paint it so you can see what you’re doing and get in all the creases, not to mention to stop it sticking together. The problem with this is that dressmakers dummies are ridiculously expensive, so I fashioned something that would do. I stuck a broomstick handle (a piece of dowel or something might be better, ideally you want it as tall as you or a little taller) into a christmas tree holder and glued a large hanger on top. Obviously it’s no good for actual dress making but it’s useful for this, or hemming I’d imagine.

For the paint, I was absolutely not buying that much fabric paint, and so I bought a tub of cheap matt white emulsion and a small tub of blacks. Start with a total covering of dark grey. Once it’s dry, add in a little white for mid-grey highlights, and use a sponge to add it to prominent areas. I did this again adding more white again for a few more highlights. I’d save the painting until you’ve made everything though, so the shades all match.

IMG_4065

And you’re done!

More coming on the wings, mask and wig.

2 Comments

Filed under Uncategorized

Comic Con 2014

Sorry for the neglect, every spare second of the last few weeks has been channeled into making my costume for Comic Con, and I was seriously worried it wouldn’t get done. But it did!

The first photos taken were done at 10pm last night :/ because that was when it was done! so here it is, a weeping angel!

20140719-094238-34958787.jpg

A little rumpled and dark but it was only the final check. The wings were closed to get out the door and I forgot to re-open them once out. What can I say, I was exhausted!

IMG_4108

You blinked!

I was really nervous to go to Comic Con this morning, it was my first con and first ever cosplay, but it was fantastic! I absolutely loved it. In what was an amazing compliment, I was asked for my photo many times! such a boost to my worried mind about the costume. I saw loads of amazing costumes too, but I didn’t have my phone most of the time (gloves made it impossible) and Rich was taking care of Henry. I did get a few later on after I changed though so let’s go!

IMG_4111 IMG_4112

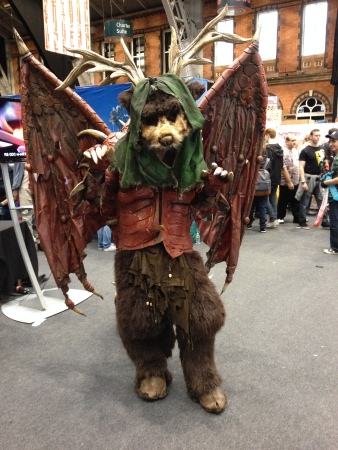
Not entirely sure who this guy is, but he was enormous and a brilliant costume.

IMG_4113 IMG_4115

With Captain Jack Sparrow, who was completely in character, weaving his way around the stalls and slurring ‘Don’t blink’ at me when I was in costume. The other guy is “The Orange box”! super cool easy idea, and everyone laughed. For non-gamers: The Orange Box is a compilation of different games made by Valve, and it comes in, you guessed it, an orange box.

IMG_4116 IMG_4117

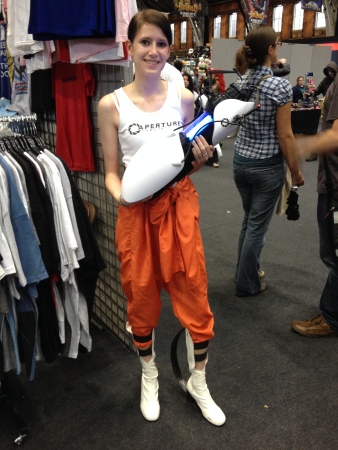
Jack Frost and Chell from Portal. She’d made the Portal gun herself, and it was fab!

IMG_4119 IMG_4121

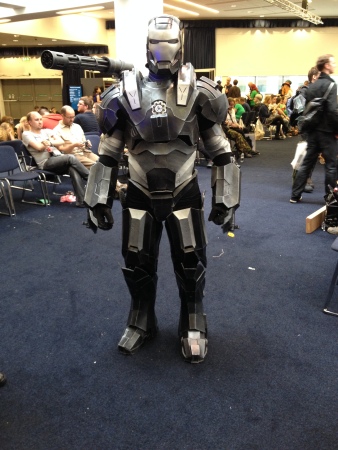
Mind-bogglingly good Warmachine, and a storm trooper from The UK Garrison. He kind of ambushed me, I took a picture of him and his partner and he walked after me to get one with me too!

IMG_4123 IMG_4124

Chell the 2nd, who let me play with her portal gun (lights and sounds!) and had made her own Longfall boots. Also Cersei Lannister, who turned and posed perfectly when I asked for a picture!

  IMG_4126 IMG_4125

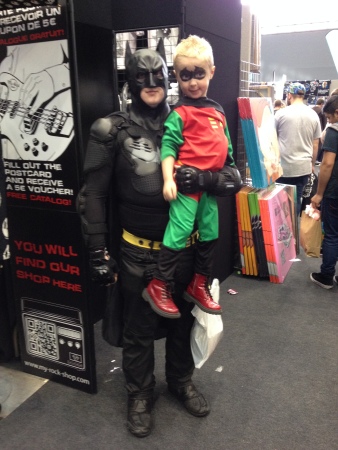
Fantastic Lady Loki – she had such a beautiful delicate wire headdress thingy instead of a helmet, but it was so fine that it didn’t show up in the picture. And last but not least, Batman and the most adorable robin ever! Look at that face! I also saw many brilliant Doctors, Doctor Horrible, Pokemon, a cross-played Rita Skeeter, and loads more. My favourite one that I didn’t get a picture of though was a Mass Effect Soldier. His suit was amazing, he’d used different textures of foam to make the different pieces and it must have taken him so much time and meticulous attention to detail. unfortunately he was powering off in one direction and Rich was headed in the other.

And here’s some better lighted pictures of my costume thanks to, you know, daylight.

photo2 photo4

Still not fab pictures, (forgot to adjust my wings again!) but I’m hoping to find some better ones online that were taken by people more talented behind a camera!

If anyone is interested, I’ll be putting up some kind of instructions for the costume at a later date, but right now I’m actually shattered. I sat down once for about 20 minutes (wings are not helpful for sitting!) to eat lunch and the rest of the day was on my feet. Still, worth it!

Just one more, because you can’t go to ComicCon and not buy anything –

IMG_4137

Teeny tiny TARDIS!

I had such a fantastic day, everyone was super lovely, polite and patient, and I kept forgetting that the mask hid my face and expressions so I hope I came off the same way.

And now, time for bed, as I am shattered!

Leave a comment

Filed under Uncategorized