Tag Archives: halloween

Halloween

We were lucky enough to get two chances the dress the kids up this year, for the trunk and treat at church and for trick or treating. So first, for the trunk and treat…
We had last minute vampire who decided he wanted this cape from the 99p shop. Thrifty!
 We also had a last minute gruffalo who refused to wear the ghost costume he’d asked me to make. Still, he had a gruffalo dressing gown and slippers already so all it took was a green felt tip for the poisonous wart at the end of his nose, and we were done. We had a fun time at the trunk and treat, I made a coconut shy with skulls in the place of coconuts in our car boot for the kids to knock down, they got sweets, bosh, done.
Then for trick or treating on our street we managed to get Sam into his ghost costume.
 He’s ‘woo’-ing. Ethan wore this Harry Potter costume, only with scar and glasses.
 We had a fun time visiting the decorated houses on our street and getting far too many sweets and chocolates, but to be honest the boys enjoyed opening the door the most. Sam spent as much time as possible with the door open, leaning out and shouting “come trickle treating!” across the street.
Henry wore this for both occasions and had no opinion. Unless you count spewing on it, which I don’t, considering he is non-discriminatory with his barfing habits.
I did 3 pumpkins,  one of which when I took the ‘lid’ off the insides were so perfect I saved them for pie.

The pie was delicious and supremely easy, I just googled for a recipe and done. Except for the part where I forgot I had already bought nutmeg and ginger ages ago and bought them again, giving me a cupboard full of it. 
And that was halloween 🙂 Lots of fun, a bit of mess and thankfully no damage done to my hands while carving the pumpkins – a first!

Leave a comment

Filed under Uncategorized

Ethan, God of Thunder and Sam, God of Mischief!

Ta-da! I’m really please with how these turned out. I think I probably could have done better if I’d not left it so late to do, I was working on them right up until the morning of Halloween.


On to the making! Ethan’s costume was quite a bit simpler than Sam’s, because I already had the suit from Asda, leaving only the helmet and mjolnir (the hammer to you and me), which were very easy. The helmet started the same as Sam’s, paper mache and a balloon.

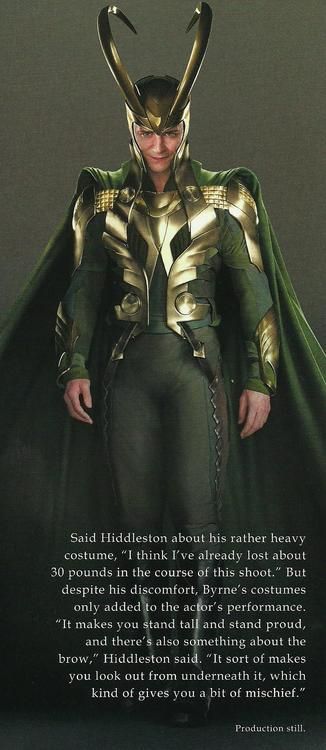
 Then I used this photo (found via good old google, I think it’s from the movie release posters) for reference to cut out the wings from craft foam – amazing stuff – and used my glue gun to add detail like so:

 Not too shabby! A tad wobbly, but alright for a kids costume. Then I glued wire to the back to help shape them. I could have used heat, if you heat fab foam a little you can re-form it and it’ll stay in the new shape. I forgot that until after the hot glue though. You can see the wire in the next picture.
 
 You can also see Mjolinr, which was really simple. I had the cardboard tube and a small cardboard box. Hole in the box, stick in the tube. Bang, done. I also put a layer of foam on the box because it was a little bashed. Then I sprayed, which was fun til I got some on the patio slabs and could smell it all day long.
A little more glue, and the helmet was done, really really easy. The handle of the hammer I just added some dark brown foam strips for the straps and handle. Ethan later asked me to take it off as he didn’t like the feel, but he kept it on for photos!

I also sewed a new cape for him as the one that came with the costume was pretty rubbish and thin, and had been hemmed so the shiny side was down. Simple enough job, buy a rectangle of shiny red fabric, hem the edges, sew on a bit of velcro at the top to attach. The suit already had velcro for the original cape so I didn’t even have to bother with that.

On to Sam. His costume wasn’t so much harder, but it had more details. This post shows how far I’d got with the helmet and jacket.

 Here’s the jacket after a coat of gold spray paint (which I now hate) for the armour. I didn’t end up putting more armour on the arms for 2 reasons – first, I ran out of time, and second, Sam had enough issues with the front piece! I used fabric glue from B&Q to glue it on, but I wasn’t happy it was held on enough so added some superglue, and later used the glue gun a bit to patch it up. I had some leftover green satin fabric from making bow ties, so I cut that to size, hemmed it, put velcro on it and the jacket, and voila, another cape.

Helmet. It actually turned out easier than I thought, once I decided to make it this way. I used long thin triangles of foam for the horns to make them slightly pyramid-y as that’s what they look like in most of the pictures I found, and glue gunned them in place. I looked at lots of other homemade ones, but didn’t use their horn instructions as they just didn’t look right. They are the place I discovered craft foam though which is absolutely brilliant.

 Then came the painting. Oh my goodness, how much do I hate the gold spray paint I used. I’m sure it was just a faulty can or other brands are better but grrrrr. The first can I used did the pieces on the jacket fine, and part of the helmet before it ran out (it was a small can). So I went and picked up another one. I don’t know what I did wrong but somehow that one separated! I got some gold bits but a lot of silver bits. Either way, it looked a mess. The shop I’d gone to for the paint was in Leeds and this was the day before Halloween and I didn’t have time (or the inclination!) to spend another £5 plus petrol going to get more. I looked through some shops here, no joy for spray, but in B&Q (again, awesome) I found some gold emulsion. Now, I don’t know who the heck would paint their walls metallic gold, but I grabbed a tester pot and went with it. It was ok. It was drippy and took an absolute AGE to dry, but it covered the patchy awfulness.

 Ta-da again! Here also is Sam’s staff of Loki, and of this I am quite proud. I tried to find pictures online but it’s a pain, as he has 2 or 3 different ones in the film. I eventually found This brilliant blog post where a guy has finished his own (MUCH more professional!) staff. It gave me a great point of reference for shapes and general ideas.

I started off with a long cardboard tube again, it had previously been a sword for a knight costume for Ethan. Sam had a blue glitter and water filled bouncy ball which I thought would do well for the stone. I wanted to stick a torch inside the tube to light it up, but couldn’t find one thin enough. Then I noticed on that blog that there was a sort of metal junction-y bit under the stone, and I had a torch small and thin enough for that. So…

There it is! the blade-like parts are all sprayed foam, the 2 sections under the ball are the torch. All glue gunned into place. It wasn’t the neatest glue job, but again, time. I made a small cut away it the top of the tube so I could turn the torch on and off as the switch was annoyingly on the bottom end, then covered it with a flap of foam.
All in all, I’m pretty pleased with the results. I thought I might have bitten off more than I could chew with this, but it was all surprisingly simple once I’d got all the plans in my head. Sam didn’t want to wear his helmet much, and it rained on us while ‘trickle treating’ as Ethan calls it, but we had a pretty good time anyway, and they got plenty of treats!

1 Comment

Filed under Uncategorized

Sam’s Loki Costume – in process.

So Halloween is approaching, less than two weeks to go. Eek! need to get a wriggle on with the costumes!

Luckily, they are proving to (so far) follow the simple ideas in my head. As they’re just for the kids I’ve simplified a bit. In fact with Ethan I’ve completely cheated, the base of his Thor costume is shop bought, as I was having issues with finding tops in the right pattern and it was only £12.50. I’m planning on modifying it as it’s not as detailed as I’d like. Anyway, onto progress pics!
 

I found this picture via Pinterest for a good front on view of Loki’s armour and helmet. I decided to simplify it not only for ease, but also because when you’re making it for a 2 year old, the pieces get slightly weeny, and sort of pointless.

So here is Sam’s jacket so far –

 I intend to add the shoulder and forearm guard bits. The yellow is just craft foam, lightweight and bendy, practically indestructible even for my Sam. Each side piece is 2 pieces of foam, the curved main bits and the thinner top piece. to make the sort of wing-ish design I just cut into the foam but not right to the other side, so it’s still all joined on the curved edge, and slightly overlapped them. I tried glueing them in place with PVA as I was told that’d work on craft foam. Not so if there is any sort of pull or resistance. Superglue however was brilliant, even if I did lose a couple of fingerprints in the process. The circles I just stuck on, again, superglue. The jacket was a simple black zip through sweater from Asda, £3 I think. Though they don’t tend to sell black clothes for 2 year olds, so I bought it in age 3-4 and took it in, super easy, especially if you’re not too fussy about the finished sleeves.There were literally no small boys clothes in a dark enough green, so black had to do. The foam isn’t glued on yet, I’m going to spray it gold first. I’m not sure about how to attach the necklace type bit, probably glue on one side and velcro on the other so I can still get to the zip to put him in it.

And now, the helmet –

Paper mache. I’ve done 3 basic helmet shapes and it took the best part of 2 days, with layers and drying glue and what not. Why have I done 3 you ask? well. One for Sam, one for Ethan. The third was the first attempt of Sam’s, but I made it too small, and it scratched his face putting it on. Whoops :S For the right size I measured their heads at the largest point, then added a couple of inches (I forgot to add the inches in the first attempt) then inflate a balloon, with the balloons widest point measuring the same. With Sam’s second attempt it was actually a little bit too big, and he looked like a bobble head! Sigh. So this time I just cut a slit all the way up the back and overlapped the sides until it looked ok.

A tip to cut down on the time you spend paper mache-ing – draw the shape of the helmet on the balloon, and just make sure you overlap the lines a small amount. You can’t see in the picture, but the back stops about halfway down the balloon. It leaves a bigger gap to get the thing on his head, and also stops it being too tall for his head too. This means that if you cover the whole balloon you’re then cutting off an awful lot of waste, which you’ve just spent yonks glueing onto the balloon and waiting for it to dry. Can you tell I also did this on the first one?

The horns are plant wire I found in B&Q for a couple of pounds. I’ll be adding craft foam to them to make them much fatter and more 3d. Then I’m going to try adding a few craft foam details to the helmet before spraying it gold. I’ve already sewn a rectangle of green satiny material for his cape, and he’ll just wear dark trousers and wellies.

For a costume process post, this is a bit wordy! Will update with more progress when it happens!

P.S. Spellcheck says ‘gluing’ is the correct spelling. It just looks wrong though, so I’ve left the e in. Sorry if it makes you twitch 😉

Leave a comment

Filed under Uncategorized